Ghost Frog v1.0
Adventures in resin crafting
September 04, 2021One of the things I planned to do after I retired last year was work on some craft ideas that have been boiling around my head for a while. The first starting point was a long-standing interest in things that glow. By "glow" I specifically mean phosphorescence, which emits over long time scales - hours, in the case of modern materials. Shorter-term (often effectively instantaneous) fluorescence is also interesting in the form of LED wire and so on, but not my immediate focus. So I've wanted to create things that glow for a while, and a few years ago I discovered that resin crafting is a really really good way to do that. In my case I'm using epoxy resin, and I'll see how far I can take that before I even consider other types because they're all smelly and dangerous. My first few projects were basic shapes - coaster, pyramid, skulls from a silicone candy mold I had lying around. (Note to self: make more glowing skulls for Halloween.) Then I started getting ideas. "Uh oh," says anyone who knows me. Specifically, my ideas led me to this.

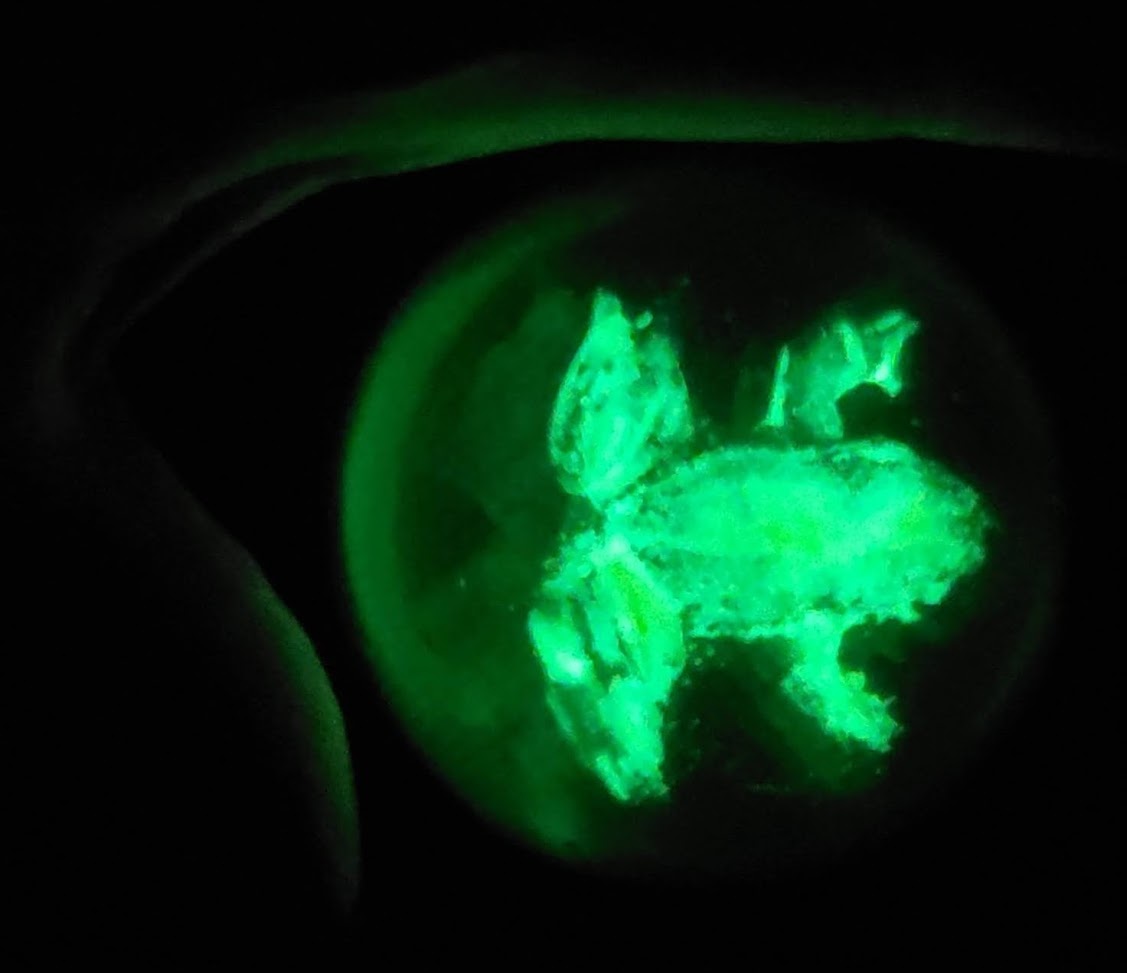
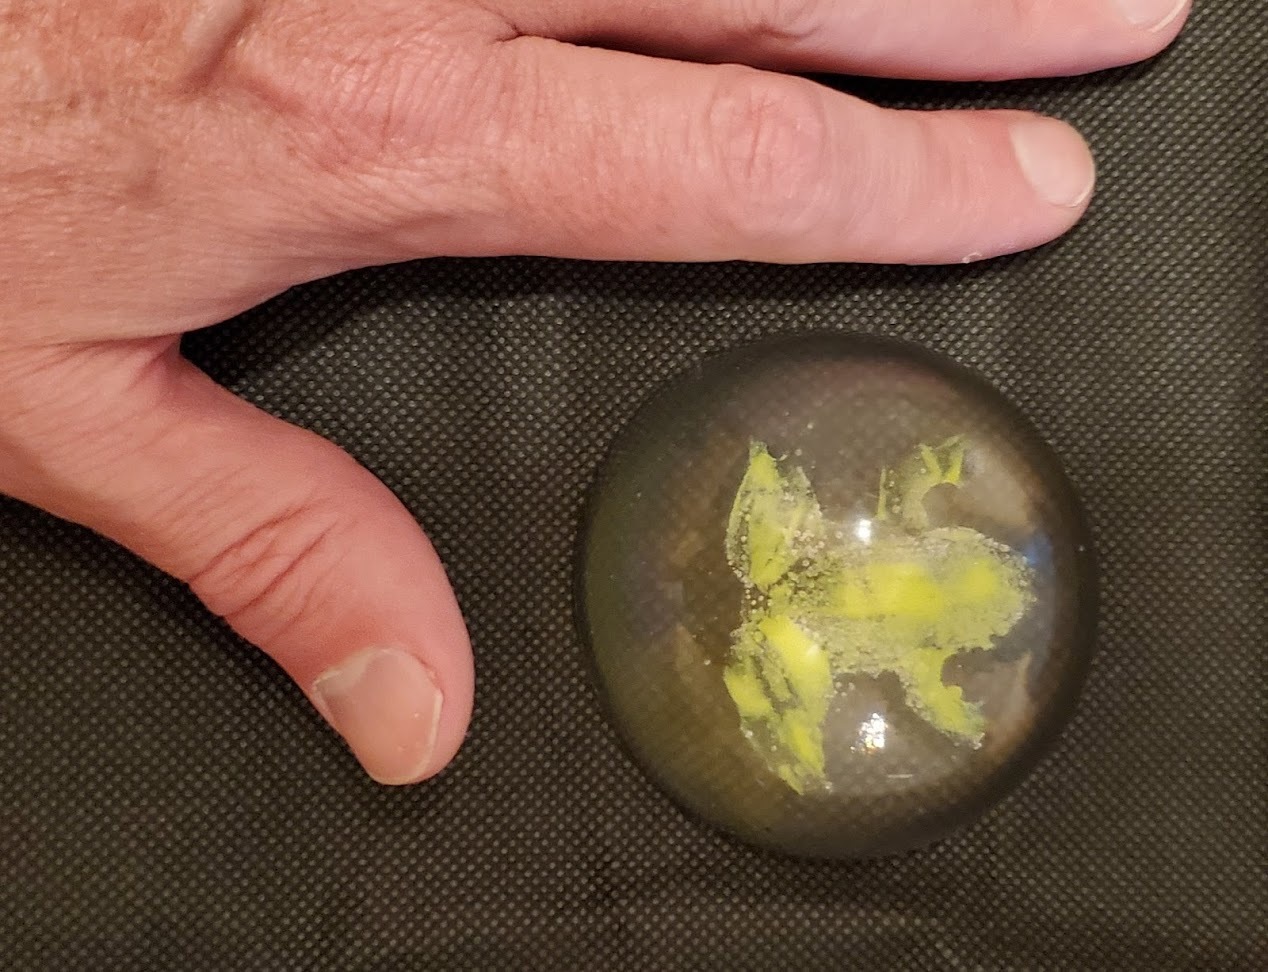
Say hello to Ghost Frog. One item on a long list of things I need to learn is how to take better photographs of things that glow in the dark, because my phone's auto settings do a poor job with light levels and even with focus. However, the point should be clear - it's a frog, and it glows (brightly enough to illuminate my hand next to it), and it's embedded in a clear dome. Here's the same thing in normal light, again using my hand for scale.

Note that the color is quite different. This is not a camera artifact. All of the glow powders I'm using are at least a bit different in light vs. dark. Some of them are quite intentionally formulated to be almost white in daylight, then glow aqua or purple or whatever. That's one of the things I like about this stuff.
My process so far is like this:
- Start with an "original" - one of a bag of twenty that cost nearly nothing on Amazon.
- Use a silicone molding material to create a mold. This takes about half an hour BTW, making it the fastest part of the process.
- Mix some clear epoxy and pour it into the mold. Also pour a base into what will be the top of a hemispherical mold.
- Wait a day for both to cure. Actually it turns out that I should wait longer, for reasons I'll get into later.
- Remove epoxy frog from mold.
- Mix a tiny bit of new epoxy, brush it onto the frog.
- Sprinkle glow powder (strontium aluminate doped with europium and dysprosium - oh my) onto epoxy frog.
- Wait. This doesn't need a full cure, so not a full day, but at least a few hours.
- Position epoxy frog upside down on the base.
- Mix up the last (largest) batch of epoxy and pour it to cover epoxy frog in the mold.
- Wait another day for the final curing.
The result was actually better than I'd hoped for a first run, though it still offers plenty of room for improvement. My eventual goal is to have something that just barely shows up in daylight (using the epoxy itself instead of something else as the powder adhesive is part of this) but is then distinguishable when it glows. BTW it won't always be frogs either. One part of my long-term plans is to switch to 3D printing instead of mold-making and create versions with interesting mathematical objects. (Downside: even with clear MSLA resin the objects won't have the same index of refraction as the epoxy so they'll be more visible.)
As I said, there are plenty of avenues for improvement. Here's a list, partly for my own reference and partly for anyone else who might have more experience and feel inclined to offer suggestions.
- Better mold making. I made this one a bit too thick, which led to a real challenge removing the epoxy frog without breaking either it or the mold. It also had a tiny hole which caused some minor leakage. I'm glad I had put things on a disposable work surface instead of directly on the table. Capturing all of the detail (especially the tiny hands) is hard.
- Better mixing and pouring. A shape like this tends to hold tiny bubbles, which are clearly evident in the daylight picture. Higher quality resin might help with this, and also with clarity. You can't really see the swirls in the picture, but you would if you had the result in your hands. Also, the piece seems to have a tiny soft spot on the bottom, which is the result of not mixing resin and hardener in the right ratios. This cheap stuff is not really 1:1 and I'm still learning exactly how far off it is, so I've run into this a couple of times.
- Better application of glow powder. My ideal would be to have a much sparser coating, but before I can get there I need to work on making it more even. I have some ideas, but this is probably going to be my biggest challenge.
- Better positioning. Both this piece and the one I made using the original (non-epoxy) frog ended up being practically on top of the dome even though there had been a thicker base layer. They sank into the base layer. Maybe letting that base cure more completely - three days, according to every source I can find - will help. Maybe I need to suspend the object into the first resin pour and then pour a second layer on the eventual bottom instead.
That's a lot to work on, but that's a good thing for someone with a lot of time on their hands. Meanwhile, I already bought an LED base for it and I've set it up as a bedside light until v2.0 comes along.